Rare Relic Documentation Tips: Professional Methods for Preserving History and Value
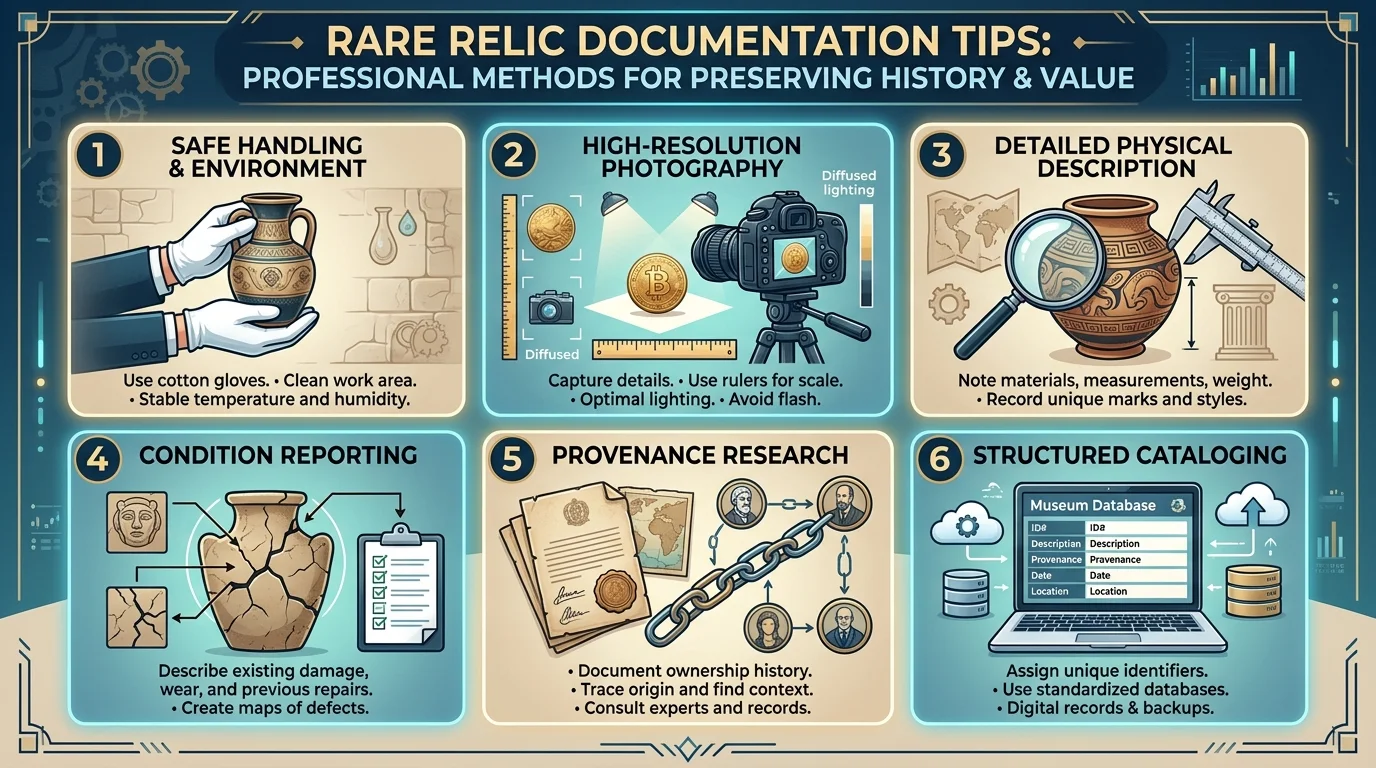
Table of Contents
| Documentation Component | Purpose | Key Tools/Methods |
|---|---|---|
| Inventory Recording | Track existence and location | Unique ID codes, location codes |
| Cataloging | Detailed object description | Structured forms, terminology standards |
| Condition Assessment | Document preservation state | Condition scoring systems, photography |
| Photographic Documentation | Visual record | Scale bars, multiple angles, RAW format |
| Provenance Research | Ownership history | Auction databases, archival records |
| Digital Storage | Long-term preservation | Cloud backup, CMS platforms |
| Emergency Response | Disaster preparedness | Pre-planned protocols, rapid documentation |
Understanding Documentation: Inventory vs. Cataloging
Before diving into specific tips, it is essential to understand the two primary levels of heritage documentation: inventory and cataloging .
Inventory: The Basic Record
Inventory answers two fundamental questions: Does the relic exist? And where is it located? . An inventory includes a unique identification code, a brief description, and the physical location of the object. This is the foundation of any collection management system.
For rare relics, the inventory process should begin immediately upon acquisition or discovery. The National Museum of Denmark emphasizes that for metal detector finds, exact “on-site” registration of location by GPS-coordinates and immediate photo documentation of the preserved condition are essential first steps .
Cataloging: The Detailed Record
Cataloging is a more comprehensive process that gathers extensive information about each object, from its physical characteristics and archaeological context to bibliographic references and conservation status . Professional cataloging includes two approaches:
Parametric Cataloging: Designed for specific purposes such as exhibitions or publications. This involves specialized catalogs focusing on particular object types like ceramics or textiles .
Continuous Cataloging: A permanent process that accumulates all documentation on an object over time, building a complete dossier or “catalogue raisonné” .
Tip 1: Establish a Systematic Location Coding System
Before documenting individual relics, create a reliable system for identifying where each object is stored or displayed. The United Kingdom Antarctic Heritage Trust (UKAHT) demonstrates best practices through their work in Antarctica’s historic huts.
Their system assigns a letter code to each site, a number to each building on the site, and a number to each room within each building. For every elevation (North, South, East, West), they create diagrams showing all possible locations including cupboards, shelves, hooks, and table tops, allocating codes to each. This produces specific location codes like “A/B1/R6/W/H4” .
For home collectors, a simplified version works: assign room codes (LR for living room, OF for office), shelf or cabinet numbers, and specific shelf levels.
Tip 2: Document Immediately Upon Discovery
The most critical documentation occurs at the moment of discovery or acquisition. The National Museum of Denmark provides specific protocols for handling potential treasure troves :
- Do not attempt to conserve or clean the objects with any substances
- Do not make casts of the objects
- Avoid incorrect packaging that could cause permanent damage or loss of information
- Take immediate “on-site” photos showing the preserved condition
- Record GPS coordinates with precision
- Contact the local museum immediately if you suspect the location is a grave or hoard deposit
The National Research Institute of Cultural Heritage adds that before collecting important relics, advice should be sought from experienced experts, and a collection plan should be drawn up with appropriate equipment selected and prepared in advance .
Tip 3: Use Structured Documentation Forms
Professional documentation relies on standardized forms to ensure consistency and completeness. Archaeological documentation clauses specify that for small sites (fewer than 100 artifacts), you should sample and list artifacts, noting unique items and those with diagnostic characteristics .
Key documentation elements include :
- Provenience information for every artifact
- Typological classification listing artifacts by types
- Measurements, illustrations, or photographs of artifacts
- Descriptions using terminology widely recognized by historic archaeologists
- Documentation of broken artifacts that can be determined to be represented by multiple pieces
For unique or diagnostic artifacts—those with maker’s marks, labels, manufacturing characteristics, or other diagnostic attributes—special attention should be given to identification, description, and visual documentation .
Tip 4: Professional Photographic Documentation
Photography is arguably the most important visual documentation tool for rare relics. The El Brujo Archaeological Complex in Peru has developed comprehensive protocols :
Technical Requirements
- Use professional photographers specializing in heritage documentation—people who understand the particularities of cultural heritage objects
- Employ adequate and varied equipment: high-resolution cameras with macro and wide-angle lenses, controlled professional lighting, and specialized editing software
- Shoot in RAW format for professional post-editing, but also save in JPG or PNG for administrative and dissemination uses
Standardized Protocols
- Include a scale bar in every photograph to establish dimensions
- Capture multiple angles including overall views and detail shots
- Photograph maker’s marks, damage, and distinctive features separately
- Use consistent lighting across documentation sessions
Organized Storage
Implement a digital system that classifies images according to object type, object code, and file type, with backup copies to prevent loss .
Tip 5: Capture Material Evidence Objectively
When describing relics, focus on objective, observable evidence rather than subjective interpretation. The El Brujo documentation team emphasizes recording :
- Manufacture marks: Tool marks, joinery, construction techniques
- Use evidence: Stains, wear patterns, residues
- Deterioration: Cracks, corrosion, discoloration, losses
- Previous repairs: Visible restorations, replaced components
This practice protects scientific integrity and allows objects to be understood as material testimonies of history, not merely isolated artifacts .
Tip 6: Implement a Condition Scoring System
To track changes in relic condition over time, implement a standardized scoring system. The UK Antarctic Heritage Trust uses a 1-4 condition score where 4 represents the most unstable condition .
A practical condition scale for collectors:
| Score | Definition |
|---|---|
| 1 | Excellent: No damage, original condition |
| 2 | Good: Minor wear, stable |
| 3 | Fair: Visible damage,可能需要 attention |
| 4 | Poor: Active deterioration, needs immediate conservation |
Record condition scores during initial documentation and update them during periodic inspections.
Tip 7: Preserve Provenance Information
Provenance—the documented ownership history of a relic—is essential for authentication, valuation, and legal compliance. Document :
- Acquisition date and source (seller, auction, inheritance)
- Previous owners if known
- Purchase price and any appraisals
- Location history (where the object has been stored or displayed)
- Any export or import documentation
For archaeological finds, record the specific context: associated materials (pottery, bone, charcoal), soil conditions, and nearby features .
Tip 8: Create Digital Backups and Use Collections Management Systems
Physical documentation should be complemented by digital storage. The El Brujo project uses a Digital Platform for the Management of Archaeological Collections (PDGCA) that integrates fieldwork information with laboratory and storage data .
For individual collectors:
- Scan all paper documentation at high resolution
- Store digital files in multiple locations: local drive, cloud storage, external hard drive
- Use consistent file naming conventions: “ObjectID_Date_PhotoType.jpg”
- Consider collections management software for larger collections
The Antarctic cataloging team designed an Excel spreadsheet to capture information that could be directly imported into their Collections Management System (Modes) upon return from the field, demonstrating that even simple tools can be effective when properly structured .
Tip 9: Plan for Emergency Documentation
Disasters can strike unexpectedly. The National Research Institute of Cultural Heritage emphasizes that prior measures should be thoroughly prepared against possible accidents, and collection should ideally be carried out within a single day if possible .
Emergency documentation preparation includes:
- Pre-prepared documentation kits with cameras, scales, labels, and packaging materials
- Written emergency protocols for evacuation and salvage
- Prioritized lists of most valuable or irreplaceable items
- Off-site backups of all documentation
Before collecting important relics in emergency situations, record them in detail, photograph them, and remove any obstacles from the area .
Tip 10: Follow Professional Ethical Guidelines
Documentation is not merely a technical process—it carries ethical obligations. The American Institute for Conservation (AIC) provides core principles :
- Documentation must be accurate, complete, and permanent
- Records should be preserved for future access by other professionals
- Documentation should avoid jargon when intended for non-conservators
- Sensitive information (such as human remains) should be handled with respect and appropriate restrictions
The AIC Code of Ethics states that examination and treatment documentation is an essential part of professional practice and recommends the permanent retention of such records .
Tip 11: Differentiate Between Two-Dimensional and Three-Dimensional Objects
Documentation methods should vary based on object type. The El Brujo team notes it is important to distinguish between two-dimensional objects (such as textiles or paintings) and three-dimensional objects (such as ceramics or tools), as this affects the technical recording methodology and photographic techniques applied .
For three-dimensional objects, capture:
- Measurements of height, width, and depth
- Multiple rotation views
- Details of all sides including base and interior
For two-dimensional objects, capture:
- Overall flat view with even lighting
- Edge and verso details
- Frame or mounting information
Tip 12: Include Bibliographic References
Professional cataloging includes bibliographic references that situate the relic within existing scholarship. Document :
- Published references where the object appears
- Comparable objects in museum collections
- Expert opinions or attributions
- Exhibition history
For rare books and manuscripts, follow specialized standards such as the RBMS guidelines for early printed resources, which address transcription of title pages, pagination, and format .
Sample Documentation Template
| Field | Example Entry |
|---|---|
| Object ID | 2026.001 |
| Object Name | Ceramic Vessel |
| Classification | Storage Jar |
| Date | 18th century |
| Origin | Jiangxi Province, China |
| Material | Porcelain with cobalt underglaze |
| Dimensions | H: 25.4cm x W: 18.7cm x D: 18.7cm |
| Weight | 1.2kg |
| Condition Score | 2 (Good) |
| Condition Notes | Minor rim fritting, stable |
| Provenance | Acquired from estate sale, 2026 |
| Location Code | OF/C2/S3 |
| Photographs | 2026.001_01_front.jpg; 2026.001_02_back.jpg; 2026.001_03_base.jpg |
| Bibliography | Smith 2019, pp. 45-47 |
Conclusion
Rare relic documentation is a skill that combines scientific precision, historical awareness, and ethical responsibility. By implementing systematic inventory practices, professional photography, condition tracking, and digital backups, collectors and institutions can ensure that their treasures—and the stories they carry—are preserved for future generations. The most important principle, echoed across all professional guidelines, is consistency: document everything, document it accurately, and preserve the documentation as carefully as the relic itself.
FAQ
What is the difference between inventory and cataloging for rare relics?
Inventory is a basic record that answers “does the relic exist?” and “where is it located?” with a unique code, brief description, and location. Cataloging is a detailed record that includes physical characteristics, context, condition, bibliographic references, and conservation history .
How should I photograph a rare relic for documentation purposes?
Use a professional photographer experienced with heritage objects. Include a scale bar in every shot. Capture multiple angles including overall views and detail shots of marks and damage. Shoot in RAW format and save copies in JPG or PNG. Use controlled, consistent lighting .
What should I do immediately after finding a potential rare relic?
Do not attempt to clean, conserve, or cast the object. Take immediate on-site photos showing the preserved condition. Record GPS coordinates. Package properly without causing damage. Contact your local museum immediately, especially if you suspect the location is a grave or hoard deposit .
Why is provenance documentation important for rare relics?
Provenance—the documented ownership history—is essential for authentication, establishing legal ownership, determining market value, and understanding the object’s historical journey. It also helps prevent trade in illegally excavated or stolen artifacts .
What condition scoring system should I use?
A simple 1-4 scale works well: 1=Excellent (no damage), 2=Good (minor wear), 3=Fair (visible damage needing attention), 4=Poor (active deterioration needing immediate conservation). Record scores during initial documentation and update during periodic inspections .
How long should I keep relic documentation?
Permanently. The AIC Code of Ethics recommends permanent retention of examination and treatment records. Documentation aids future care, adds to the profession’s body of knowledge, and protects against litigation and misunderstandings .
Can I use simple tools like Excel for documentation?
Yes. The UK Antarctic Heritage Trust successfully used Excel spreadsheets to capture cataloging information in the field before importing into their formal Collections Management System. The key is consistency and completeness, not expensive software .