Rare Object Repair Techniques: Expert Methods for Preserving History
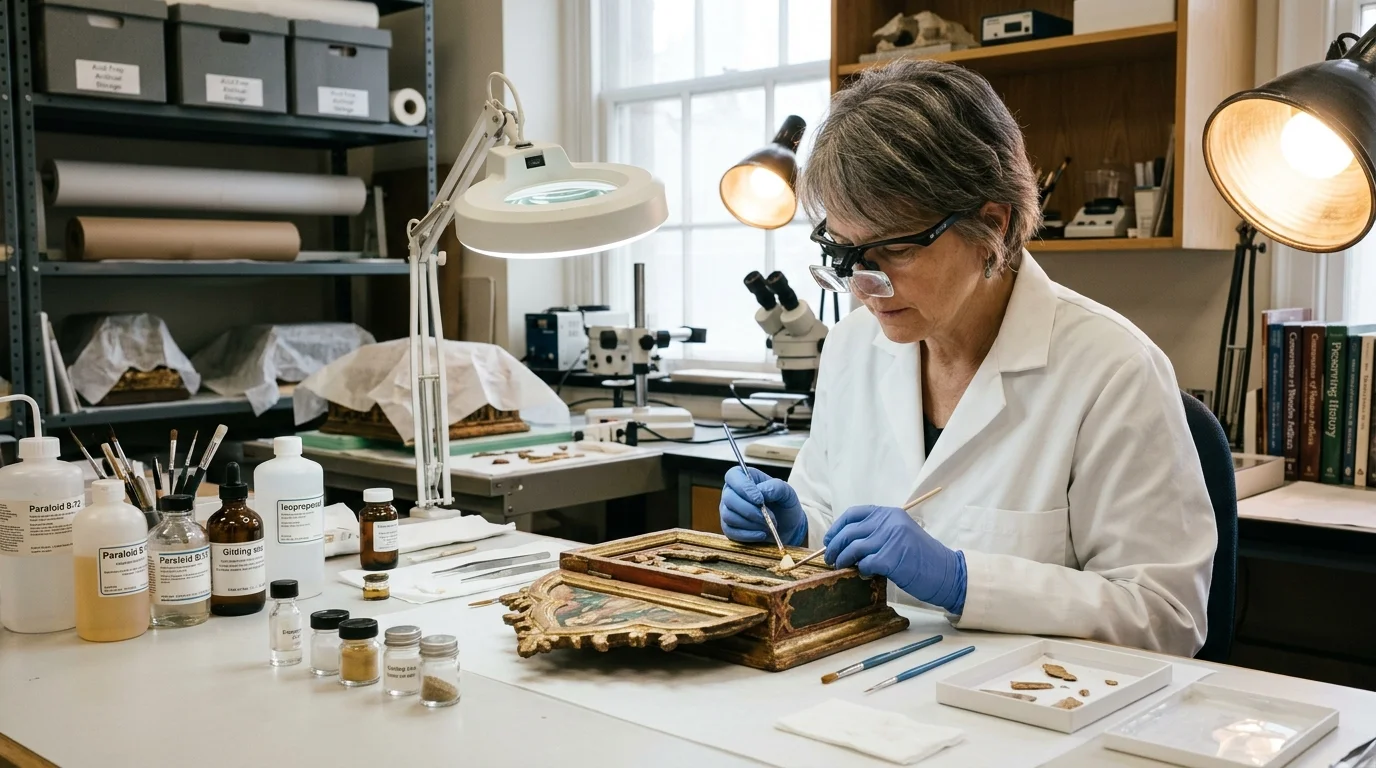
The Core Principles of Rare Object Repair
Before examining specific techniques, it is essential to understand the ethical framework that governs professional conservation. All repairs in this guide are based on three fundamental principles that protect both the object’s integrity and its value .
| Principle | Definition | Application |
|---|---|---|
| Minimal Intervention | Only the necessary actions to stabilize the object are performed | Cleaning, stabilizing, but avoiding over-restoration |
| Reversibility | All treatments should be removable in the future without damaging the original | Using reversible adhesives, documenting every step |
| Discernibility | Repairs should be distinguishable from original material upon close inspection | Color matching that blends but doesn’t deceive |
These principles exist for good reason. As one conservator notes, “My goal is not to make these items like new, but to ensure they last a few hundred years more, when they can be reassessed by future conservators” . Over-restoration is one of the quickest ways to devalue an antique. Any non-reversible alterations that remove original finish or patina should be approached with extreme caution .
Scientific Analysis: Diagnosing Before Repairing
Before any repair begins, conservators must understand exactly what they are dealing with. Modern scientific analysis provides a foundation for precise diagnosis.
X-Ray Fluorescence Spectrometry (XRF)
Handheld XRF analyzers allow conservators to identify the elemental composition of metals, ceramics, and other materials without taking physical samples. At the Inner Mongolia Museum, conservators used XRF to analyze harmful corrosion on a gilded silver saddle ornament from the Tang Dynasty before beginning any cleaning .
Fourier-Transform Infrared Spectroscopy (FTIR)
FTIR helps identify organic materials such as fibers, dyes, adhesives, and coatings. This information is critical because different materials react differently to cleaning solvents and consolidation agents .
X-Ray Diffraction (XRD)
XRD analysis identifies the crystalline structure of materials, helping conservators distinguish between harmless patina and active corrosion that threatens the object’s stability .
Portable Digital Microscopy
High-magnification examination reveals details invisible to the naked eye: hairline cracks, previous repair attempts, tool marks, and the condition of surface coatings. This information guides every subsequent decision.
Wood and Furniture Repair Techniques
Wooden antiques are among the most common objects requiring repair, but they are also among the most frequently damaged by improper interventions.
Cleaning Without Damage
Gentle surface cleaning: Dust with a lint-free cloth or natural bristle brush. Use a small artist’s brush to clean carved details and moldings .
For sticky grime: Lightly dampen a cloth with distilled water and a drop of pH-neutral soap. Avoid all-purpose furniture sprays, as they can leave residues that attract dust or react with old finishes .
Reviving dull surfaces: Conservators often favor microcrystalline wax applied sparingly and buffed with a soft cloth .
What to never do: Never sand or strip unless absolutely necessary. Sanding removes the original surface and patina, which are integral to both value and authenticity .
Structural Repairs Using Traditional Adhesives
Critical warning: Avoid modern PVA glues for antique furniture repairs. While stronger, they create rigid joints that may split the surrounding wood as it expands and contracts with humidity changes .
Japanese-Inspired Clamping Systems
For complex furniture repairs, conservators at the Getty Museum adapted a Japanese-style clamping system called shinbari. This technique applies pressure to specific areas while adhesive dries, using small battens and cord to create precise, adjustable tension . This approach is particularly useful for veneer consolidation and inlay work where uniform pressure is essential.
When to Call a Professional
French polishing, veneer repair, inlay work, or serious structural issues such as split panels should be handled by an experienced restorer .
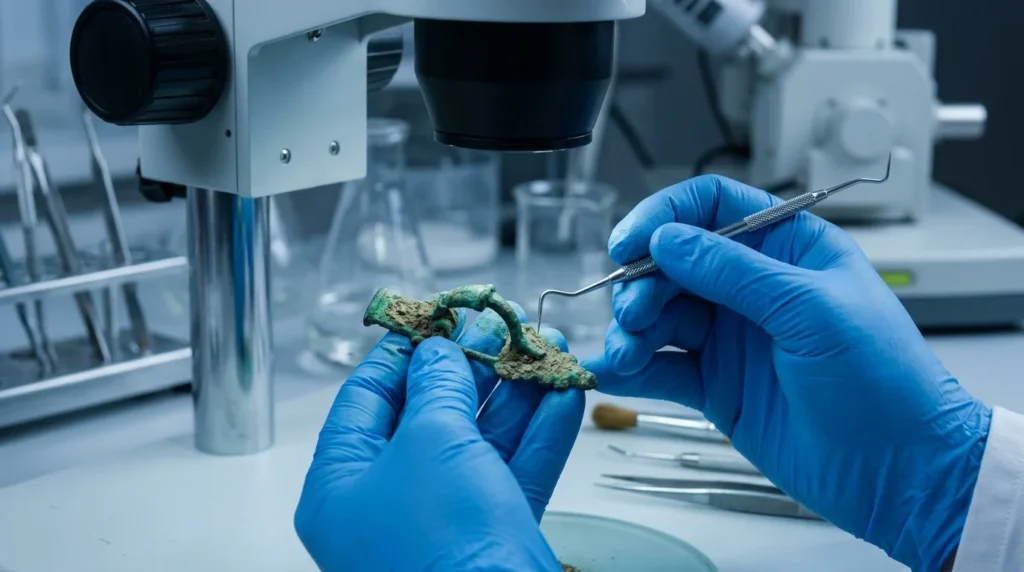
Metal Repair and Conservation
Metal objects present unique challenges because corrosion can be both a destructive force and a valued aesthetic feature (patina).
Removing Corrosion Without Destroying Patina
CO2 snow cleaning: One of the most innovative techniques for metal conservation uses micron-size particles of solid carbon dioxide to remove corrosion. Unlike commercial dry-ice blasting (which uses millimeter-sized pellets), CO2 snow is a fine, controllable stream that removes green corrosion product from recesses without altering the patina and surface color . This technique was used successfully on the brass mounts of an 18th-century French clock at the Cleveland Museum of Art.
Animal glue peels: For unvarnished brass, conservators use an animal glue peel—an established practice with new modifications. The glue and additives cause a chemical reduction that minimizes corrosion blemishes on the metal surface, acting like a “spa treatment” for the metal .
Manual cleaning with precision tools: At the Inner Mongolia Museum, conservators spent nearly two months cleaning a gilded silver saddle ornament using scalpels, bamboo splinters, and cotton swabs—working with surgeon-like precision to remove hard surface deposits without damaging the underlying metal .
Silver Repair and Restoration
Re-plating techniques: For silver items that have lost their original plating, professional re-plating can restore appearance without damaging the base metal. However, this should be considered irreversible and used only when the object’s function requires it .
Cleaning without over-polishing: Over-polishing strips away the thin layer of oxidation that gives antique metal its patina. Use non-abrasive metal polish sparingly, applied with a cotton bud or cloth only to areas that need brightening .
Iron and Steel: Electrolytic Reduction
For rusted iron artifacts, conservators can use electrolytic reduction—a process that converts iron oxide (rust) back into stable iron using a low-voltage electrical current in an alkaline solution. This technique is reversible and does not remove original material .
Ceramics and Glass Repair
Ceramics and glass are vulnerable to breakage, and improper repairs can be both visible and damaging.
Safe Handling and Initial Assessment
Before any repair, assess the damage. For valuable pieces, photograph from all angles before touching. Support fragile ceramics from the base rather than by the handle, rim, or stem, which are more susceptible to breaking off .
Adhesives for Ceramic Repair
What to avoid: Many adhesives yellow over time, leaving visible repair lines. Superglue can cause permanent staining on porous ceramic surfaces .
Filling Losses and Inpainting
For chips and missing sections, conservators use materials that can be color-matched and are reversible:
- For ceramics: Epoxy resins mixed with pigments, or gypsum-based fills for less critical areas
- For glass: Acrylic resins that match the refractive index of the original glass
- Inpainting: Reversible paints (often watercolors or specialized conservation paints) applied only to fill material, not original surface
Strengthening Porous Ceramics
For archaeological ceramics that have become porous and weak, conservators can impregnate the object with polyvinyl acetate (PVA) in a solvent that evaporates, leaving the strengthening resin within the pores. This technique is also used for bone and ivory objects .
Textile and Leather Repair
Organic materials like textiles and leather are particularly vulnerable to environmental damage and improper handling.
Leather Conservation
The Liao Dynasty embroidered bag: At the Inner Mongolia Museum, conservators faced a thousand-year-old embroidered leather bag from the Liao Dynasty (916-1125). Made of leather, textiles, and bronze, the bag posed a significant challenge because each component has different “temperaments” and moisture tolerances .
The restoration process included:
- Bespoke rehydration regimen: Slowly reawakening leather fibers under strictly controlled temperature and humidity to safely detach the bronze buckle
- Low-pressure vacuum cleaning: Using localized negative pressure to gently remove surface dust
- Crease smoothing: Patiently working every fold while supporting fragile sections
Critical insight: Restoration follows no fixed timetable. Continuous monitoring and expert judgment determine each next step .
Textile Cleaning and Stabilization
Vacuuming with protection: Use low-suction setting with a soft brush attachment. If fabric feels brittle, hold a piece of muslin cloth over the surface to protect it as you vacuum—this helps prevent pulling or fraying .
Avoid wet cleaning unless absolutely certain the fabric can tolerate it. Older textiles often have unstable dyes that will bleed or fade when dampened, and some natural fibers can shrink or distort .
Humidification chambers: For rigid or brittle textiles, conservators use humidification chambers—plexiglass domes that hold aerosolized water vapor—to soften fibers before flattening or repair .
Vellum and Parchment
Vellum (prepared animal skin used for bookbinding and manuscripts) can become rigid and brittle over time. Conservators use controlled humidification to make it workable again before cleaning and reconstructing damaged bindings .
Paper and Book Conservation
Paper artifacts require specialized techniques because of their fragility and the irreversible nature of many common repairs.
The Philosophy of Paper Conservation
“What makes jobs like mine necessary is that many of our rarest collection items are already several centuries old. Many have seen better days, but the fact that they haven’t completely fallen apart after hundreds of years is a testament to the quality of craft that went into their creation” .
Common Paper Repair Techniques
| Technique | Purpose | Method | Reversibility |
|---|---|---|---|
| Japanese paper fills | Filling losses | Toning Japanese paper to match; adhered with wheat starch paste | High |
| Leaf casting | Filling holes in multiple pages simultaneously | Automated machine deposits paper pulp into gaps | High |
| Washing | Removing discoloration and acids | Immersion in purified water (alkaline bath) | Moderate (professional only) |
| Mending tears | Stabilizing without obscuring | Thin Japanese paper and wheat starch paste on reverse | High |
| Deacidification | Neutralizing acids | Alkaline spray or immersion | Moderate |
Reversible Adhesives for Paper
- Wheat starch paste: The gold standard for paper conservation; reversible with water
- Methylcellulose: Synthetic alternative with good reversibility
- Japanese tissue: Thin, strong paper used with wheat starch paste for tear repairs
What to never use on paper: Pressure-sensitive tapes (masking, duct, packing, Scotch tape), rubber cement, white glue, or any adhesive not specifically designed for conservation .
Addressing Past “Over-Zealous” Treatments
Many rare books suffer from previous well-intentioned but damaging treatments. One conservator describes a book from the late 1500s or early 1600s where “another conservator was a little overzealous with the leather dressing, and the binding needs to be cleaned and rehoused” . Such issues are common and require careful, patient correction.
Advanced Scientific Techniques: Cutting-Edge Conservation
Modern conservation increasingly employs techniques borrowed from materials science, chemistry, and even medicine.
Hydroxyapatite Consolidation for Waterlogged Ivory
One of the most remarkable recent developments is a biomimetic method for strengthening fragile, waterlogged ivory artifacts. Inspired by natural bone structure, conservators use calcium-based solutions that form a hydroxyapatite network within cracks and fissures .
Results from Sanxingdui artifacts:
- 69.7% increase in hardness
- 90.9% increase in elastic modulus
- Reduction in water loss during dehydration from 31.3% to 9.6%
This minimally invasive technique not only strengthens the artifact but also reduces water loss during drying—a critical factor for waterlogged archaeological materials .
Gel-Based Cleaning Systems
At the Getty Museum, conservators developed a gel based on the chemical composition and physical properties of Silly Putty to target the removal of tenacious varnish residues from a Boulle marquetry clock case. The gel can be applied precisely and removed cleanly, unlike liquid solvents that can spread and damage surrounding areas .
Rehydration Protocols for Composite Objects
When bronze and organic materials are combined (as in the Liao Dynasty leather bag), their different moisture tolerances create significant challenges. Conservators devised a bespoke “rehydration” regimen to slowly reawaken leather fibers under strictly controlled temperature and humidity—allowing safe detachment of the bronze buckle without damage .
When to Repair and When to Preserve
Not every damaged object should be repaired. The decision requires careful consideration of multiple factors.
| Consideration | Repair Recommended | Preserve As-Is Recommended |
|---|---|---|
| Structural stability | Object cannot be safely handled or displayed | Object is stable despite cosmetic damage |
| Historical significance | Damage obscures important features | Damage is part of object’s history |
| Intended use | Object will be used functionally | Object is for display only |
| Rarity | Common object; replacement parts available | Extremely rare; any intervention risky |
| Previous interventions | Past repairs are damaging current object | Past repairs are historically significant |
The Clock That Wasn’t Restored to Function
The Cleveland Museum of Art’s 18th-century French clock provides an instructive example. After extensive conservation of the case, mounts, and face, the museum chose not to restore the movement to working order. “The clocks in the CMA collection are displayed in a state of suspension rather than functionality for their long-term preservation, which is standard practice for art museums” .
Instead of replacing original parts and putting the mechanism at risk, the museum recorded the clock’s functions with audio and video and collaborated with a university music department to identify the 11 tunes the carillon plays. This approach preserves the original object while still allowing visitors to experience its intended function .
Documentation: The Essential Step
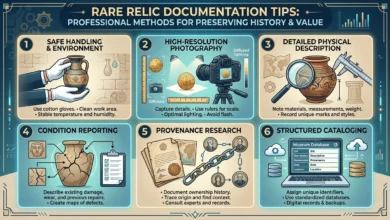
Every repair, no matter how minor, should be documented. This serves both the current owner and future conservators.
What to Document
| Documentation Element | Description | Format |
|---|---|---|
| Before photographs | Multiple angles, close-ups of damage | Digital (RAW or high-resolution JPEG) |
| Treatment proposal | Planned actions and rationale | Written report |
| Materials used | Specific products, suppliers, lot numbers | Written list |
| During photographs | Key stages of the repair | Digital images |
| After photographs | Same angles as before photos | Digital images |
| Condition report | Detailed description of final state | Written report |
Practical advice: “Photograph your piece from every angle before you begin—this serves as both a record and a guide if you need to reassemble it after repairs. If you make changes, document them. Keep receipts, write a short account of what was done and why. This simple archive can help future owners and valuers understand its journey” .
Frequently Asked Questions (FAQs)
Q1: What is the most common mistake people make when repairing antiques?
A: Sanding original finishes and over-restoration. As one expert states, “Anything that takes away original features or patina—painting over quality wood, replacing original handles with shiny modern ones, or over-sanding so the crisp edges and fine details disappear—can devalue a piece” . The second most common mistake is using inappropriate adhesives like superglue or modern PVA glues.
Q2: Can I repair a ceramic chip myself?
A: For valuable pieces, no. Professional conservators use color-matched fills and reversible adhesives. Superglue can cause permanent staining and yellowing over time . For inexpensive pieces where appearance doesn’t matter, two-part epoxy can be used, but be aware the repair may be visible and irreversible.
Q3: What is the safest adhesive for antique furniture repair?
A: Traditional hot hide glue (animal protein glue) is the professional standard. It is reversible, allows future restorers to work with the joint, and does not damage surrounding wood. Avoid modern PVA glues, which create rigid joints that may split the wood as it expands and contracts .
Q4: How do conservators remove old, damaging repairs?
A: Removal methods depend on the original repair material. Old adhesives may be soluble in specific solvents (water for hide glue, acetone for Paraloid). Mechanical removal using scalpels under magnification may be necessary. This is highly skilled work; improper removal can cause more damage than the original repair.
Q5: What is CO2 snow cleaning, and when is it used?
A: CO2 snow uses micron-size particles of solid carbon dioxide to clean metal surfaces. Unlike commercial dry-ice blasting, CO2 snow is fine and controllable, removing corrosion from recesses without altering patina. It was used successfully on brass mounts of an 18th-century French clock at the Cleveland Museum of Art .
Q6: How can I tell if a previous repair is damaging my antique?
A: Signs of damaging repairs include: discoloration around repair areas (yellowing adhesives), rigid joints that have caused wood splitting, visible glue lines, surface residues that cannot be removed, and any repair that cannot be reversed without damaging original material.
Q7: Is it always necessary to repair damage to a rare object?
A: No. The Cleveland Museum of Art chose not to restore a clock movement to working order to avoid replacing original parts. Instead, they recorded its functions digitally . The decision depends on whether the damage affects structural stability, whether the object will be used functionally, and whether the damage is historically significant.
Q8: How do I find a qualified professional conservator?
A: Look for conservators accredited by professional organizations such as the American Institute for Conservation (AIC), the Institute of Conservation (ICON-UK), or similar national bodies. Ask about their treatment philosophy—ethical conservators will discuss minimal intervention, reversibility, and documentation before starting any work.
Q9: What should I do immediately after discovering damage to a valuable antique?
A: Do nothing. Do not attempt to clean, glue, or otherwise intervene. Photograph the damage from multiple angles. Isolate any broken pieces (do not try to fit them together). Contact a professional conservator for assessment. Improper first aid is often more damaging than the original injury.
Q10: How has technology changed rare object repair?
A: Technology has transformed diagnosis (XRF, FTIR, XRD), enabled new cleaning methods (CO2 snow, gel systems), and introduced biomimetic consolidation (hydroxyapatite for ivory) . However, hand skills—scalpel work, brush techniques, traditional joinery—remain essential. Technology augments, not replaces, the conservator’s expertise.